

- Published on
Getting Started in Unreal Engine 5 - Blueprints | Part 2
- Authors

- Name
- Hardly Brief Dan
- @HardlyBriefDan/
Introduction
In this second part of the tutorial series, we are going to create our first Blueprint Actor, the Lightning Tornado Obstacle. This Blueprint Actor will have a few features:
- Collision Detection
- Launch the Player Character in the air when collided with
- The ability to be Activated and Deactivated
- Play sound effects
- Apply Damage to the Player Character when collided with (In the next Tutorial)
This series is written as both part of my Udemy Course and to accompany the sections of the course I am releasing on my Youtube channel.
Prerequisites
In order to follow along with this tutorial, I am assuming you have installed Unreal Engine 5. If you have not, you need to download and install the engine, please visit Unreal Engine Download website to get started. Epic Games created a great video to get you going.
You should have also created the project and installed the FX Pack as we did in the previous tutorial.
Creating A Lightning Tornado Obstacle
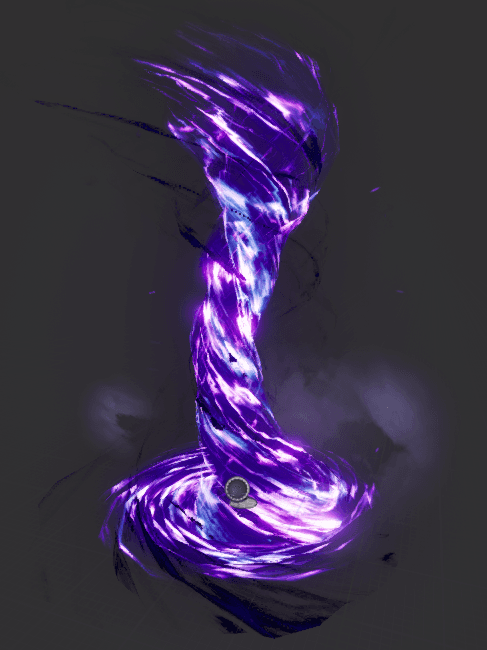
We are going to start off this project by building a Lightning Tornado Obstacle that will be a Blueprint Actor. This obstacle will act as a barrier between our Player Character and the Goal Location we will create in a later tutorial. The visuals for this tornado comes from the FX pack we added to the project in the previous post so be sure you have it installed.
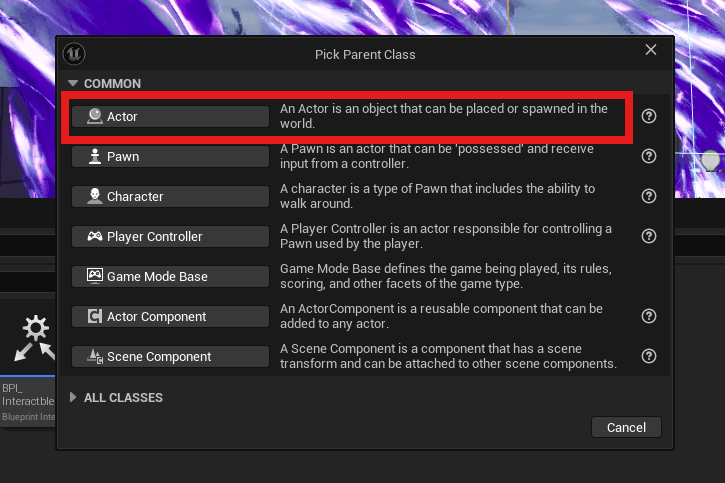
Start by right clicking inside the Blueprints Folder we created last time and click Blueprint Class. This will open a window similar to the above picture. Select Actor to create an empty Blueprint Actor file. Name the file whatever you'd like but I named mine BPA_Tornado.
In Unreal Engine, Blueprints are often prefixed with BP or BPA. This is to help distinguish between the different files while in the Editor
Now that our new Blueprint Class is created, we can add the visual from the FX pack to bring this tornado to life! Under the components tab, click the + Add button and search for Cascade Particle System. Add this to your Actor and give it a name. Once added, select the system and in the Details tab and look for the Particles section. In this section there is a dropdown called Template. Here you can select the visual, in this case we used the P_ky_darkStorm tornado visual.
We can add the Actor into the game world now. Click and drag the BPA_Tornado file from the Content Browser into the Viewport and place it where you want.
Adding Collision
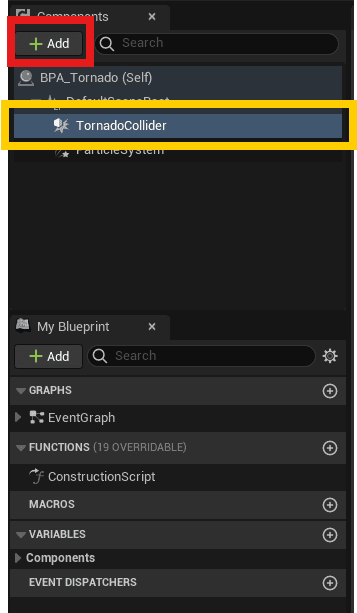
Let's make this tornado a bit more dangerous and add collision detection to it! We are going to add a Box Collision component to the Actor. Under the components tab, click the + Add (in red) and search for Box Collision. Once found, hit enter and add it to the Actor. I named the box TornadoCollider but any name will work!
This component created a cube shaped collider around the tornado. Now, if you look in the viewport with the Box Collision component selected you will see a small orange box which is the collision box. We need to scale this box and make sure it encompasses the entire tornado. To do this, you can either hit R on your keyboard while in the Viewport or you can select the Scale option button at the top right of the viewport. Here you can adjust the size of the collider using the Red, Blue, and Green colored handles in the viewport.
Be may also need to
Translateor move the box upwards. To do this you can pressWon your keyboard or look for theTranslatebutton at the top right of the viewport near the scale button.
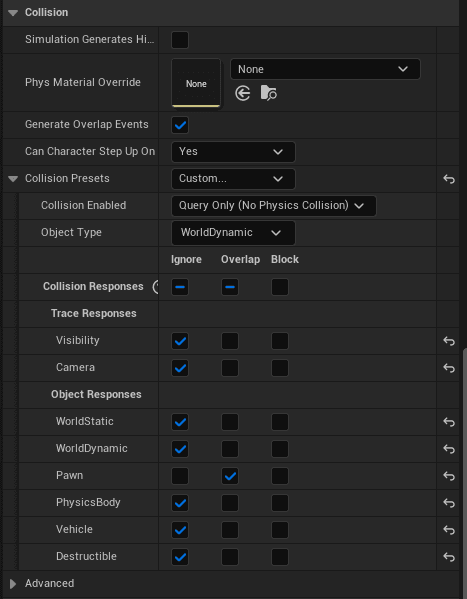
One more thing, we need to adjust the Collision settings to match the picture above. In the Details tab, with the Box Collision component selected, under Collision and then Collision Presets, change the Presets dropdown to Custom.
First, click the top checkbox for Ignore so all collisions are ignored. Then, click only Pawn under the Overlap column to make sure this collider only creates events when Pawns overlap it.
Casting to the Player Character
We have added a Box Collision component to our Actor which will allow us to detect when certain events occur and we can respond to those event. In our case, we want to respond only when the Player Pawn begins to overlap with this collider. To do that, Unreal Engine provides a built in Event we can listen too and create logic for when the event is broadcasted.
With the Box Collision component selected, in the Details tab at the bottom, you will see a list of Events. Select the On Component Begin Overlap event using + button. This will add the red event pictured below to the Event Graph. Here we can write custom logic for when the Player Pawn overlaps with the collider.
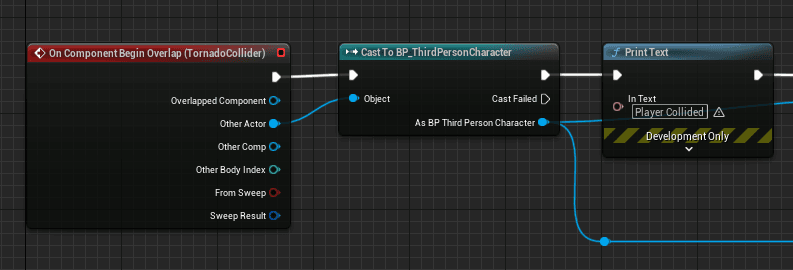
I keep saying we want to only respond when the Player Pawn overlaps with this collider. In order to do that, we can use a Cast To node to attempt to cast to the BP Third Person Character that comes with the Third Person Template project. This node is a quick way to check to see if the Pawn that collided with the Actor is the Player Pawn. If so, we can use the Top Pin of the Cast To node and continue adding more logic such as the Launch Node we will use in the next section.
Casting has a bad reputation but generally it is required in a lot of situations especially when leveraging inheritance. In this case, this cast is to a loaded object and therefore is relatively inexpensive for us to do. Just be cautious and not overuse Cast To nodes especially in Blueprints.
Launching The Player
We are detecting when the Player Pawn or Character is colliding with the Tornado. Now lets add some feedback and some fun to the game by applying a force and launching the character into the air! Unreal Engine comes with a built in node called the Launch Character node that requires the Third Person Character object from the Cast To bottom pin (the blue color pin). Connect that pin to the Target pin on the Launch Character node.
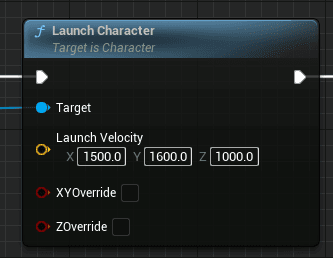
Once the pins are connected you can adjust the Launch Velocity. These values determine how fast and in what direction your player is launched into the air. I chose some higher values approximately 1500 for each of the X,Y,Z values. This is the time to experiment though and see what values you like. Once this is created, you should be able to run into the tornado in the game world and launch your player into the air.
On Hit Sound Effects
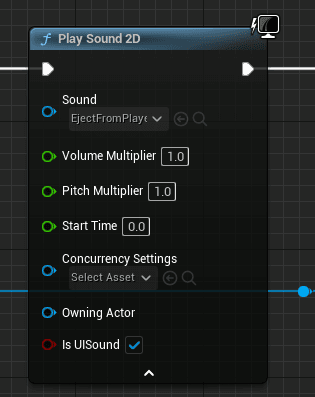
After we launch the player, we want to play a sound effect. We can do that by using the Play Sound 2D node. This node will play a sound effect as non-spatial audio. This will give even more feedback to our player that this tornado is bad news and should be avoided. Connect the output pin from the Launch Character node to the Play Sound 2D node and select the sound as EjectFromPlayer sound effect from the Starter Content.
Functions to Activate and Deactivate
One of the requirements for our Puzzle Game is to be able to deactivate and activate the tornados by using a switch. We want to create 2 separate functions to support this logic. The first one we will create is a Activate function or event inside the Event Graph. If you right click in the Event Graph and you search for Add Custom Event we can use that node to Create Activate function.
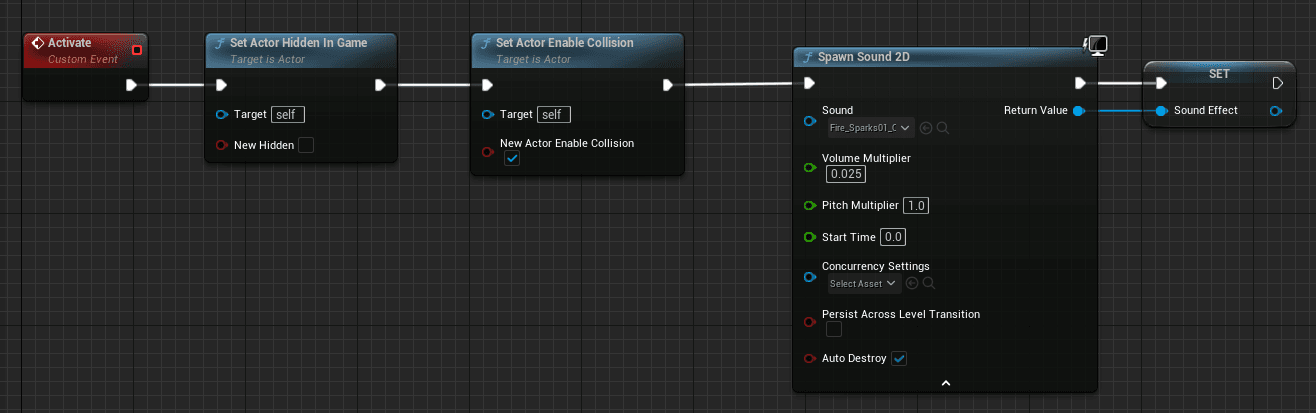
This Activate function should first use the Set Actor Hidden In Game node and make sure New Hidden is unchecked. And then connect to a Set Actor Enable Collision node and make sure the New Actor Enable Collision is checked.
Then we are going to create a Spawn Sound 2D node. This will spawn a sound for our tornado to give it a fire/spark sound while its activated. From the Starter Content a bunch of sounds were included so you can search for Fire_Sparks01_Cue. Now, drag off the Return Value pin (blue) and select Promote To Variable and name this Sound Effect. This will create a variable to store the sound component.

For the Deactivate function, we follow the same steps except the Set Actor Hidden In Game node's New Hidden is checked. And then the Set Actor Enable Collision node's New Actor Enable Collision is unchecked. Then we can use a Validated Get for the Sound Effect variable we just created. To do this, hold Ctrl on the keyboard and Click and Drag the Sound Effect variable from the Variables section of your Blueprint. Once the Get node is added you can right click it and choose Validated Get. Lastly, off the Sound Effect pin search for Stop and use the Stop node to discontinue playing sound.
Whats Next?
That was a lot to do but now we have a functioning tornado that makes sound and can throw the Player Character across the map! So one part of our puzzle game is complete!
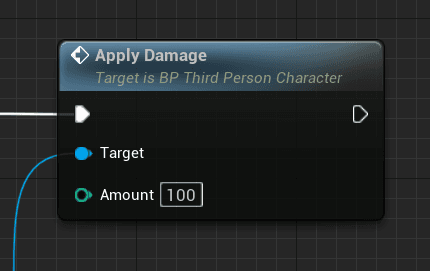
Next up, we are going to add the ability to Apply Damage to the player when they collide with the tornado.
Build Your Dream Game in Unreal Engine
I am creating a course that will teach you the core systems you need to develop a Steam-ready game. The course reviews programmings fundamentals and guides you to create these foundational components using both Blueprints and C++. Be sure to Check it out today!